Do you optimize your blog post visuals for maximum effect?
The rise in the popularity of visuals is getting people to include them in their blog posts, be it graphs, screenshots, cover images, infographics, etc. But several of them are making mistakes that can prevent them from getting the most out of these blog post visuals which can decrease readability, traffic, social media shares, etc. So here are some quick tips on how to optimize your blog post visuals for maximum effect…
1. Make blog post visuals un-clickable:
You need to make your blog posts very easy to read and one thing that could prevent this is having visuals that are linked to the image URL. People might not want to click on them, but they might do so by mistake and this could disrupt their reading. You can prevent this by not linking the image to any URL.
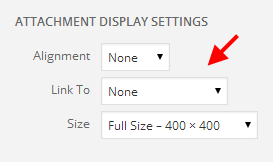
You can easily do this on a WordPress blog by choosing the ‘None’ option under ‘Link To’ in the ‘Attachment Display Settings’.
There are only two reasons for you to want to link an image to its URL. One is if it is a small image and to see it more clearly the person has to expand it and the other reason is to link the image to provide credit to the original source. If it’s something like an infographic and to view it properly the person needs to see the large version, you could create a separate page where the large version can be found. This can make it easy for you to track the traffic that page receives and to see the number of times it gets shared on social media.
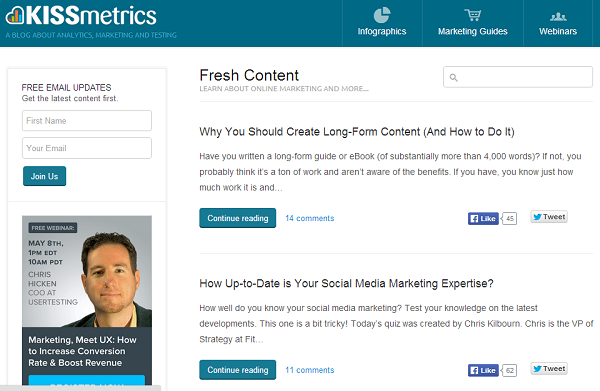
Kissmetrics does a brilliant job at this. If you check out their infographics you will notice that they can be expanded by being clicked on. On most blogs when you do this you are sent to the image URL. But on Kissmetrics you are sent to a separate web page where an expanded version of the infographic can be found. For e.g. take a look at this infographic on ‘How to Get More Likes on Facebook’. Click on the infographic and you will be able to view the larger version on a new page where there is no sidebar.
2. Add link and text to cover image:
Another blog post visual that needs to have a link placed in it, is the cover image. Here, instead of linking to the image URL, a link to the blog post itself should be placed. That way when people view the excerpt to the post they can click the cover image and visit the post.
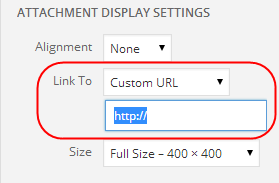
You can easily do this on a WordPress blog by choosing the ‘custom URL’ option under ‘Link To’ in the ‘Attachment Display Settings’ and the adding the URL of the blog post.
I recently wrote the post 11 Social Media Articles Loved by Pinterest You Must Read. If you go through the articles right now, you will know that many of the articles have one thing in common, a good cover image on which the title of the post is written. You will notice that a good cover image with the title imprinted on it is placed at the top of most of the popular blog posts on Pinterest which can be a powerful source of traffic. It can also have a positive effect on other social networks like Google+, Facebook, Tumblr, etc. These blog post visuals can also make the top of your article look pretty. So make sure you add one to your blog post and link it to it.
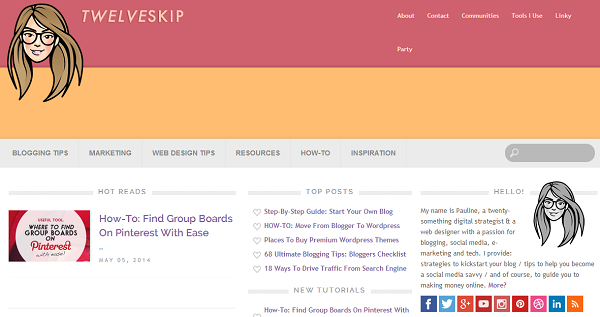
Pauline Cabrera of Twelveskip creates some fantastic cover images for her blog posts and links them to the blog posts they have been made for. They not only beautify the posts but also make it easy to visit them as you can click on the beautiful cover images and not just the headline or the ‘Read More’ or ‘Read the rest’ links found below the excerpt.
3. Adjust width of your blog post visuals:
The width of your blog post visuals should be perfectly sized as you don’t want the images to spill into the sidebar. Excluding the sidebar most blogs have a width of 600 PX so keep your blog post visuals within this size. A better option would be to check your template/theme to see the dimensions or just measure it yourself. Some templates automatically adjust the width so that the blog post visuals fit in perfectly.
4. Credit Creators below your blog post visuals:
Crediting the rights to the creator of the visual (if you have taken it from another creator) is an important step you shouldn’t miss. You can do this by mentioning their name below the visual and inserting their website URL in this name. If you forget to do this, you could end up being penalized by Google if someone complains or something worse could happen, like you being sued like Buzzfeed. Before you publish a visual on your blog post always check the image rights to ensure that you are allowed to use the visual and whether you are allowed to modify it. If you can’t find this information, just contact the creator and ask them if it would be okay. For more tips on copyright of online images read the post Copyright Fair Use and How it works for Online Images on Social Media Examiner.

Business Insider does a good job in crediting the visuals they publish on their articles. Take a look at the article The 10 Best Branded Social Media Wins of The Year So Far. You will notice that the visuals used in it are credited by the use of a link which is added to the name (stating where the visual has been taken from) below each visual.
5. Add details to blog post visuals:
Adding details like your website address to your blog post visuals is another important step. This can not only help drive direct traffic, but can also be good for SEO (as people will know who to link to), especially in the case of infographics and cover images. It always doesn’t have to be a link to your website. You could also add your logo, company name, Twitter handle, etc.
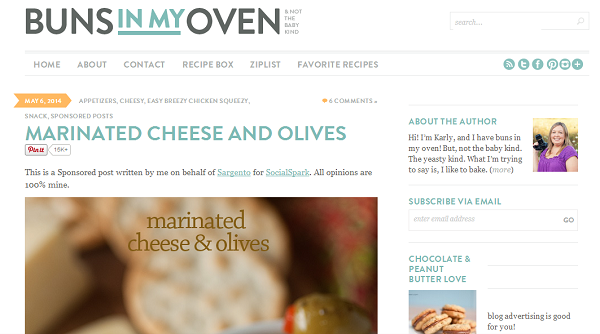
Karly Campbell of Buns in My Oven takes this important step very seriously as you can find her website name or address on most of the photos on her blog. This works out really well for Karly Campbell as her recipes are shared thousands of times. As soon as people see the photos they know where they have been shared from. This is good for driving traffic and branding.
6. Name blog post visuals appropriately:
It’s important to label the visuals in your blog posts not just for SEO purposes but also for social media sites like Pinterest where the name the image has been labelled with appears as the pin description. The description can influence how well your visuals (and therefore your blog posts) perform on Pinterest. For more tips on optimizing blog post visuals for Pinterest read the post 9 Tips to Create Outstanding Pins for Pinterest.
You can also learn more about adding images to blog posts by reading the post 5 Awesome Tips for Adding Images to Your Blog.
Sign up to have our latest blog posts emailed straight to your inbox and get the Free Video Tutorial “How to Use Pinterest for Business?”
How do you optimize your blog posts visuals for maximum effect? What type of blog post visuals have worked best for you? Please leave your comments below.
If you found this article on optimizing blog post visuals helpful and think your friends and followers will too, please share it with them by clicking on the social media share buttons below.
Would you like to create a Pinterest marketing strategy and use it set up the perfect page and get yourself followers, repins, traffic and sales? Then get The Complete Pinterest Marketing Bundle…
