How do you manage your social media presence? Would you like to use Rignite for social media management?
Choosing the right social media management tool or App can be a daunting task as there are hundreds of them and several new ones keep getting added week after week. One powerful social media management tool that caught my attention is Rignite. Rignite makes it easy for both individuals and teams to manage their Facebook, Twitter, Google+, Instagram, YouTube, and Linkedin accounts from one place. There is also a very interesting feature that isn’t available on many complete social media tools.
If you would like to use Rignite for social media management then follow the steps below. I will cover how to sign up, what the different features and how to use them…
1. Signing up for Rignite:
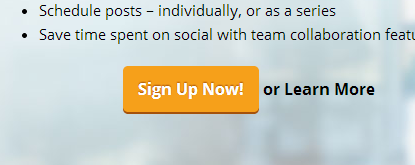
Visit this page and click on the bright yellow ‘Sign Up Now’ button.
On the next page fill the form to sign up for the free 14 day trial.
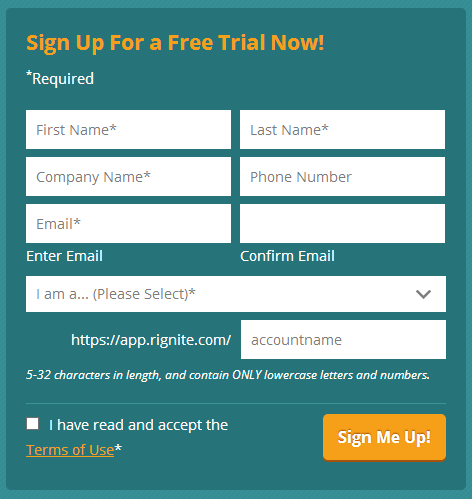
Ensure that you choose a memorable account name. Read the terms of use and accept them if you agree. Once you have filled in the form, click the yellow ‘Sign Me Up!’ button.
You will now be taken to a page where you can create a new password. Once you have created it Rignite will prompt you to add your social media accounts. You can go ahead and follow the instructions offered by Rignite to add your social media accounts.
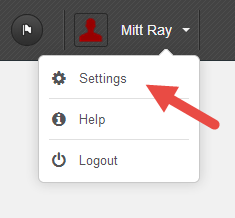
If you want to manually add your social media accounts, visit the settings page by clicking on your name and then on ‘Settings’ which appears in the drop down menu.
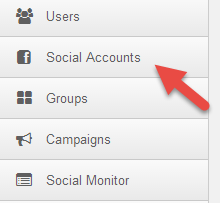
Now click on the ‘Social Accounts’ tab on the left.
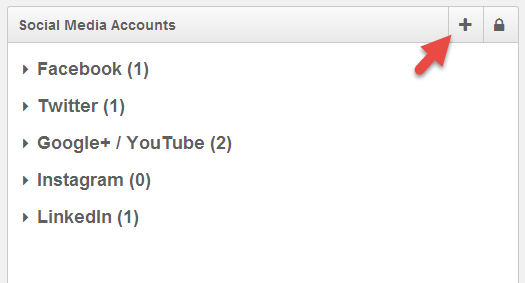
In the new page that appears click on the plus sign on the right. Now choose the social media accounts. You can add Facebook, Twitter, Google+, YouTube, Instagram and Linkedin accounts. Make sure you add an access level for your account too.
After you add your social media accounts, you can begin browsing through the rest of the tabs in the settings page. Don’t forget to check out the Groups, Notifications, Shortlinks and Schedule tabs. Also visit the Browser Extension tab and add it to your browser as you can share pages and posts you like with Rignite by just clicking it.
One you are finished with browsing through the tabs, you can visit the Monitor section of Rignite.
2. Using Rignite for Social Media Monitoring:
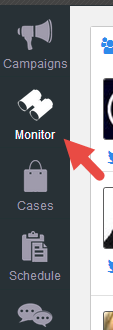
To visit the monitor section click on ‘Monitor’ which can found on the left sidebar.
With this part of Rignite you will be able to monitor your social media accounts, research keywords on social media and keep an eye on your competitors and other people like influencers.
These features will help you see what you are posting, who is interacting with them, what the trending topics are and who to connect with. So make sure you make the most of it by creating as many streams as you need and incorporate the data into your social media strategy. To learn about everything you can do with the social media monitoring feature, check out this page.
Creating streams for monitoring is extremely easy. All you need to do is visit the monitor page and click on the plus sign.
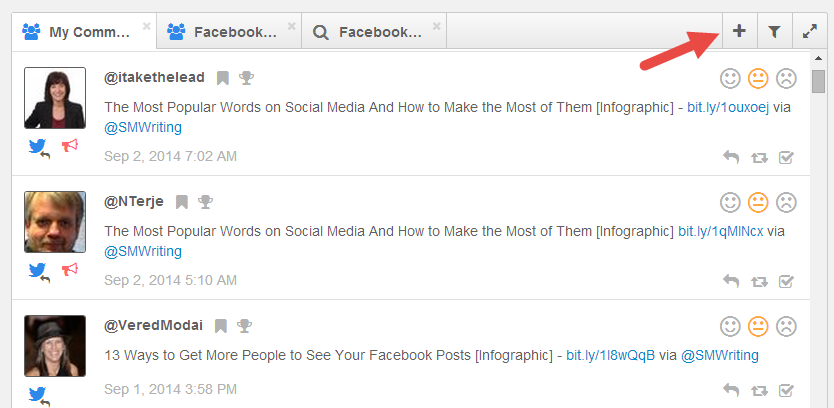
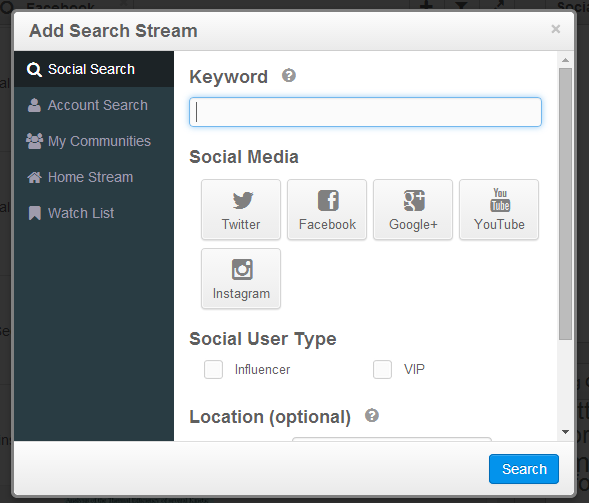
Then you can create the stream using the options available.
3. Using Rignite for Social Media Marketing Campaigns:
One fantastic feature you will notice on Rignite that you usually don’t find on other complete social media marketing tools is ‘Campaigns’. Using it you can run offers, contests, sales, etc. This can be highly influential in helping you increase engagement and gaining more followers and fans.
To create a campaign, just visit the section by choosing it from the left side bar and then clicking on the plus sign at the top which looks like the plus sign on the monitor page.
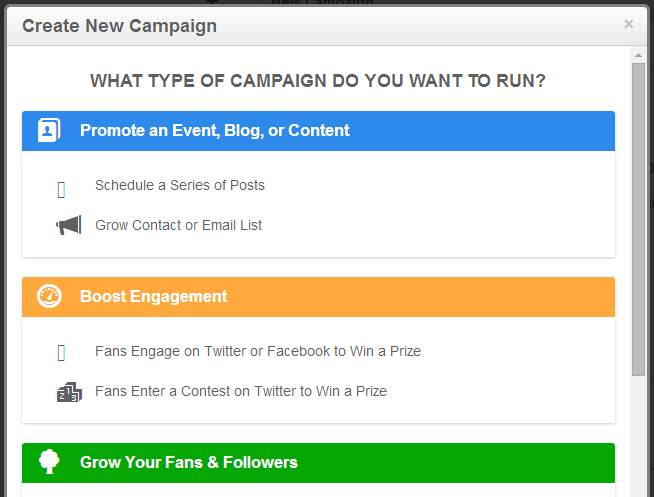
You can then create different types of campaigns by selecting from the array of options provided and then follow the steps Rignite guides you through. Make sure you fill in the campaign details, offer details and then schedule a series of posts to effectively promote the campaign. Also set notifications, so that you receive regular updates. This will help you see how well the campaign is running.
Rignite will also track your campaign and provide you with helpful analytics. Make sure you observe them to check how everything is panning out. These statistics can help you modify your current campaign and help you run powerful future campaigns.
If you plan to run a Facebook contest where your aim is to get more likes, then make sure you get started soon as Like-Gating will be banned from November 5th onwards.
4. Make the Most of Rignite Analytics:
Rignite analytics can not only be used to track campaigns, but your entire social media activity too to help you learn more about your everyday social media usage.
General social media statistics and studies can be helpful in improving your presence, but to get the best out of social media, businesses need to find their very own data. This will help you determine who your audience is, what they want and the type of posts they like interacting with.

You can find your data i.e. analytics under the ‘Dashboard’ option in the left sidebar. Use it to see where your fans live, what type of posts they like most, track clicks, likes and retweets, etc. Regularly observing this data and then determining what you have done right or wrong can help you craft better posts and campaigns in the future.
5. Provide Social Media Customer Service as a Team:
According to a report from Edison Research 42% of people expect businesses to respond within an hour after contacting them on social media.
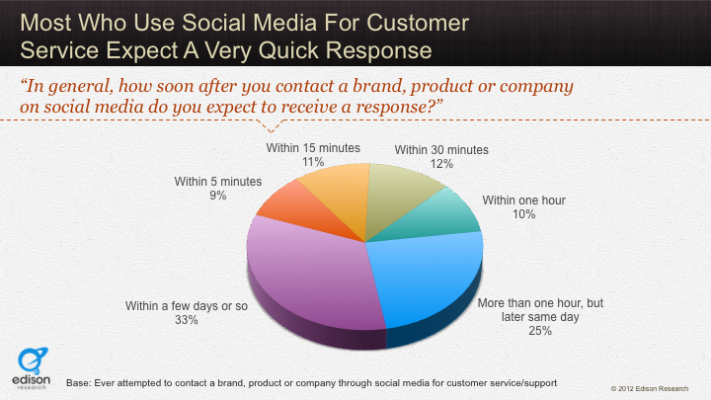
This makes it extremely important to keep a constant vigil of your social media newsfeed. But it can be hard to achieve this, especially if you have a lot of customers to handle.
Rignite makes it easy with their social collaboration software. With this feature you can assign different tasks to different users. This should increase response rates and customer satisfaction which is the requisite to a successful business. Visit the ‘Cases’ section on the left sidebar to check what you can do.
Your company’s social media and customer service teams will find this feature very helpful and easy to use.
6. Scheduling Messages:
To publish posts with Rignite, click on the field at the top where you can see the words ‘Compose message’. In the popup box that appears you can then type in your message, include a link if you would like to, then choose a social media and a time to publish.
To directly share blog posts and web pages install and use the browser extensions I mentioned earlier in the blog post.

If you would like to check all your scheduled posts and make some modifications then visit the ‘Schedule’ option on the left side bar and take a look at the calendar. The calendar can help you consistently share quality content over a period on social media.
Overall Rignite is a fantastic tool with many useful features. There are several things you can achieve with it that you can’t do with other tools. To sum up you can monitor yours and other activity, schedule updates, run campaigns, measure results, provide excellent customer support as a team and do various other things. It’s easy to use and get started as Rignite will guide you with the process as soon as you sign up with their helpful support. To get started with a free 14 day trial, visit this page.
For more social media tips sign up to our updates and the get the free Ebook How to Create Your Very Own Perfect Social Media Strategy.
Do you plan to use Rignite for social media management? Which of the above features do you find most interesting? Please leave your comments below.
