Do you want to create engaging social media images? Have you heard of Stencil?
The fastest growing social networks right now are Instagram, Tumblr and Pinterest.
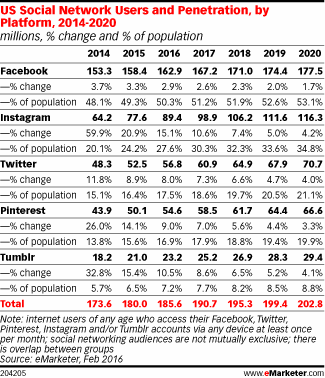
Do you know what you require to be successful on all these social media?
Beautiful and engaging images that stand out. As on Instagram and Pinterest you can only post images and on Tumblr 78.11% of the updates posted are images this is because they drive the highest engagement.
Even on established networks like Facebook, Linkedin and Twitter images get the highest engagement.
Visuals can also help you get the most out of your blog posts as posts with images get shared more on Facebook and Twitter. Images can also be used to make ads.
The applications of good images are endless.
The problem with using traditional design tools like Adobe Photoshop and Illustrator is that there is a learning curve and these tools are also expensive. On the other hand hiring a designer can cost thousands of dollars a month.
Luckily several image creation tools have popped up that are making it easy for business owners and marketers to create social media images and other kind of visuals.
One of these tools is Stencil. This tool has interesting features like access to 800,000+ free images, 200,000+ icons and graphics, easy to add quotes and so many more that can save you plenty of time.
I use Adobe Illustrator to create most of my images, but I occasionally use an online tool when I am in a hurry. One of the tools I have recently experimented with is Stencil and I am quite happy with the results.
Here are my tips on how to use Stencil to create engaging social media images…
#1 Go to the website and choose a plan:
First visit the Stencil website. Then go to the pricing page and sign up for an account. The options will be ‘Free’, ‘Pro’ and ‘Unlimited’.
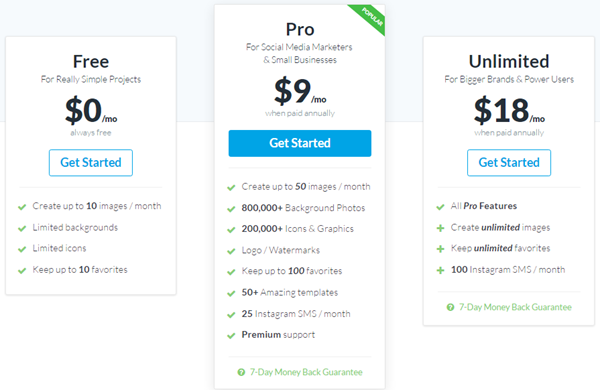
If you want to give it a test drive or you only need to create very few images every month, you can sign up for the ‘Free’ account. If you would like to create more images and need more features, you can sign up for the ‘Pro’ or ‘Unlimited’ accounts. All the features are detailed on the pricing page.
Once you are certain about the plan you want, click on the ‘Get Started’ button and fill in and submit your details and your account will be set up.
#2 Go through the ‘help videos’:
As soon as you create your account. A popup will appear. It will display all the video tutorials available.
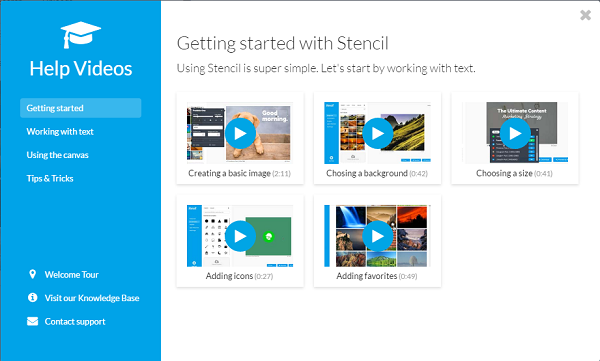
Go through all of them as they will give you a basic understanding of the what the tool offers. If you click on ‘Welcome Tour’ on the left menu, on the popup, you will also be able to get a basic tour.
#3 Now let’s start creating your first image:
After the tour you can close the popup and begin creating your social media images. First you must choose a background photo using the search field on the left.
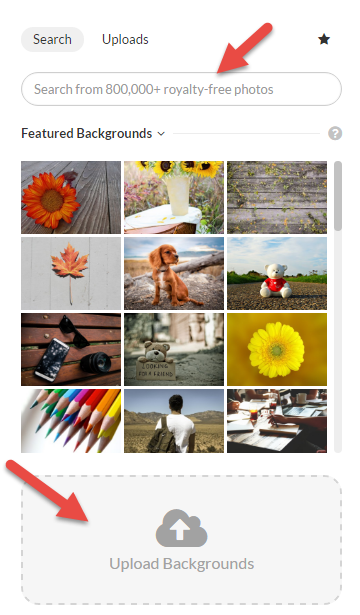
They have access to 800,000+ free images. You can also upload your own images.
#4 Make modifications to your image:
After you choose your background image you can begin making modifications to it.
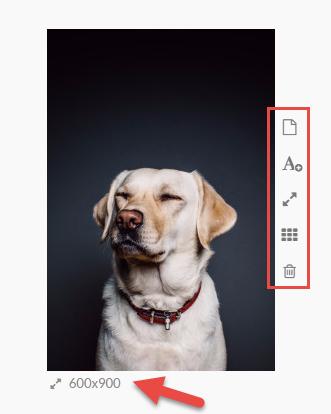
First click on the dimensions on the bottom and choose the dimensions you want your image to have.
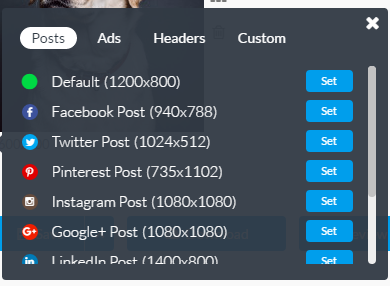
You have preset dimensions for posts, ads and headers. Choose the dimensions based on the social media you want to post to. You can also create custom dimensions.
After you choose your dimensions you should click on the image. An array of options will appear.
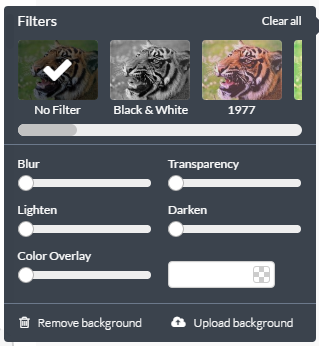
These will make it easy for you to modify the image.With these options you can choose filters, blur the image, darken the image, and do various other things.
There are also 5 other options present towards the right side of the image. I highlighted them in an earlier screenshot. If you choose the first one you can start all over again. The second ‘Add text’ option will get the text box to appear and you can add some overlay text to your image.
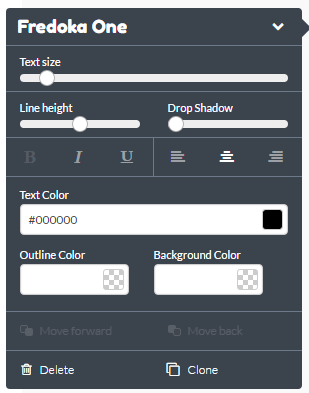
You can make modifications to the font, color, alignment of the text using the text options menu. You can also add text by just double clicking on the image.
Then there’s the ‘Resize Canvas’ option that lets you resize the image.
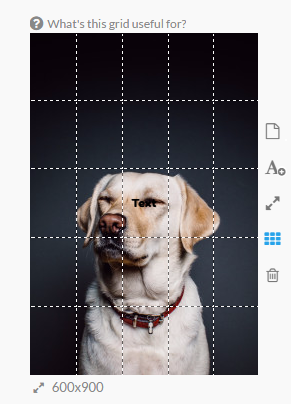
After that there’s the Facebook ad grid that makes it easy for you to be certain that there is less than 20% text in case you are making the image for a Facebook ad. All you need to do is make sure that your text does not fill more than 5 boxes. This will ensure that the image has less than 20% text.
If your image has more text than that then the reach of your image will be low and your ad will turn out to be expensive.
The clear option will delete the image.
#5 More options in the left menu:
Stencil also has many other options on the left menu that make it easy to enhance your image.
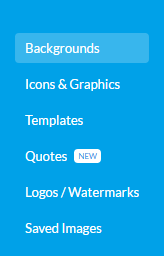
First there are 200,000+ icons and graphics. You can even upload your own.
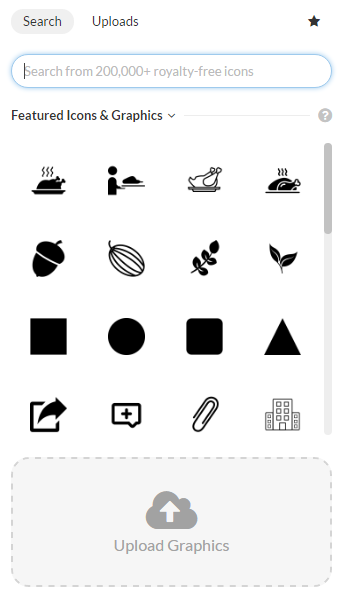
You can select the ones you like and make various modifications to them including choosing a colour and adjusting opacity.
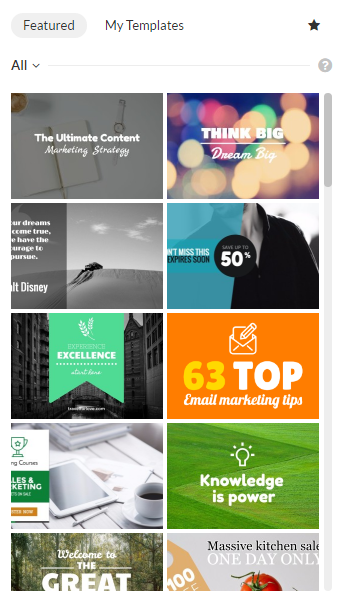
There are even social media image templates. These templates have everything added to them from the background image, to the icons to the text. All you need to do is modify the text to reflect your message and add in more stuff if you would like to.
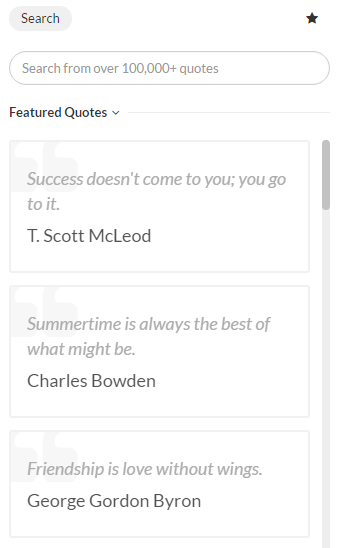
Then there is the quotes feature which is one of my favourites. You just have to browse through or search the 100,000+ quotes they have and select the quote.
This will automatically be added to the image. You can then modify the size of the text, the font and publish the image with your text. It’s that easy. If you regularly publish image quotes on your social media channels, this feature will save you a ton of time.
You can get a lot of engagement out of your fans or followers if you share quotes.
Under Logos/Watermarks you can upload some of your logos. So that after you create your image you can brand it with a couple of clicks instead of uploading it every single time.

You can even save your images for later access, download it to your system or directly share it to various social networks.
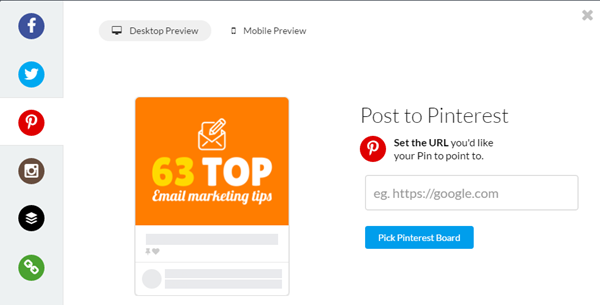
You can also share it with Buffer.
#6 Add the extensions:
Stencil also has a browser extension. To install it visit the options menu on the top right and then click on Menu.
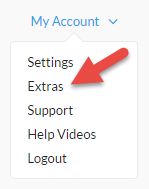
A popup will appear where you can either choose the Chrome extension or the Firefox one.
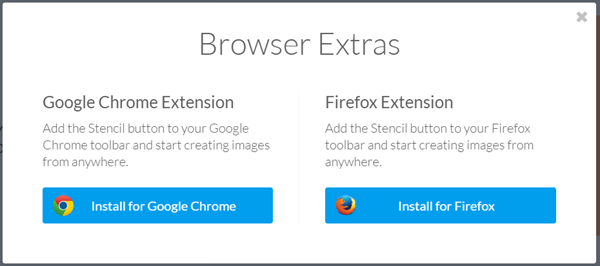
Choose the appropriate one and install it.
After you do that you can begin using it. Whenever you are on a web page and you want to modify an image you can just right click it and then click on ‘Open with Stencil’ that appears in the menu. The image will then appear in Stencil and you can make changes to it.
You can even highlight text and right click and choose ‘Stencil’. This text will open up in Stencil and you can easily add it to a background image you have chosen.
This feature can also save you a lot of time.
This is how you can use Stencil to create engaging social media images. As you keep exploring it you will notice that there are more features.
Give Stencil a try now. You will be able to create beautiful social media images with ease even if you are not a designer.
Sign up to have our latest blog posts emailed straight to your inbox and get the Free Video Tutorial “How to Use Pinterest for Business?”
Have you used Stencil to create engaging social media images? What other tools do you use to create social media images? Please leave your comments below.
If you found the above post useful and feel your followers will too please share it with them by using the share buttons below.
