If you want to build a stellar online presence right now, 2 social networks you should focus on are Instagram and Pinterest.
Instagram is the one of the fastest growing social networks and it drives the highest engagement.
While Pinterest is the second highest referrer of social media traffic. Facebook is first, but most of the traffic it refers is probably through ads.
On Instagram and Pinterest you can build a presence organically and drive free traffic and sales without the use of ads. In order to do this you need to post frequently to both social networks.
The optimal number of pins to post on Pinterest is 15 to 25 a day.
On Instagram this is 7+ posts a week (about 1 post a day).
All these posts should be scheduled to go out at the most optimal time and they should be optimized to drive the highest engagement and traffic. This is why you should use a scheduling tool that makes it easy to schedule to Pinterest and Instagram in advance.
Most of the popular tools like Hootsuite and Buffer let you to schedule to both these networks, but they aren’t best option. This is because these are generalist scheduling tools that were initially created to manage multiple social networks like Facebook, Twitter and Linkedin.
You should instead use a tool like Tailwind that was created specifically for scheduling to Pinterest and Instagram. It has an array of advanced features that most other social media apps don’t have.
So, to help you navigate it and easily schedule posts on Pinterest and Instagram, I have created this guide for you…
Some of the links in this post are affiliate links. This means that if you make a purchase I will earn a small commission at no additional cost to you.
Using Tailwind to Schedule to Pinterest
You can sign up for a Tailwind account for free. Your first 100 pins are free.

All you need to do is visit their website and click on the red Sign up with Pinterest button.
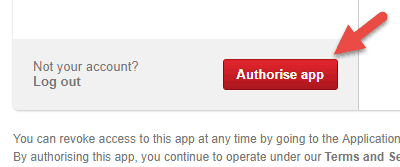
After that a popup will appear asking you to authorize the app. Authorize it by clicking on the red button.
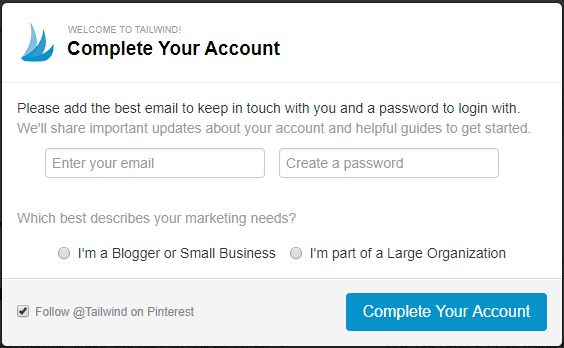
Next add your email address, password and other details and complete the creation of your account by clicking on the blue button.
After that Tailwind will ask you to add their chrome extension. Go ahead and add it as this will make it easy for you to schedule pins from a page.
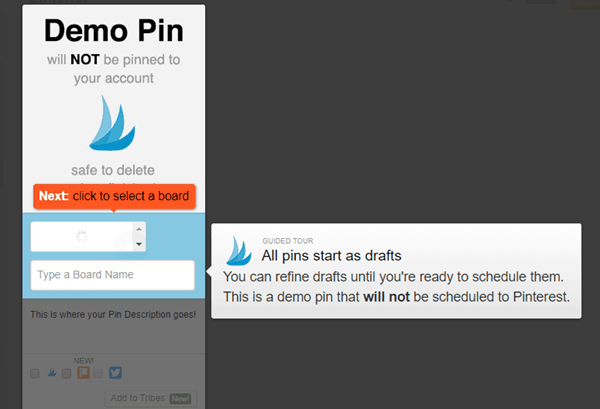
Tailwind will then guide you through the process of scheduling a pin on their website. Go through the steps provided to learn the basics of using this tool.
After you learn how to create and schedule pins, Tailwind will show your pin schedule. These timings are automatically generated by them after analysing your Pinterest activity to find your most optimal times thanks to their SmartSchedule feature.
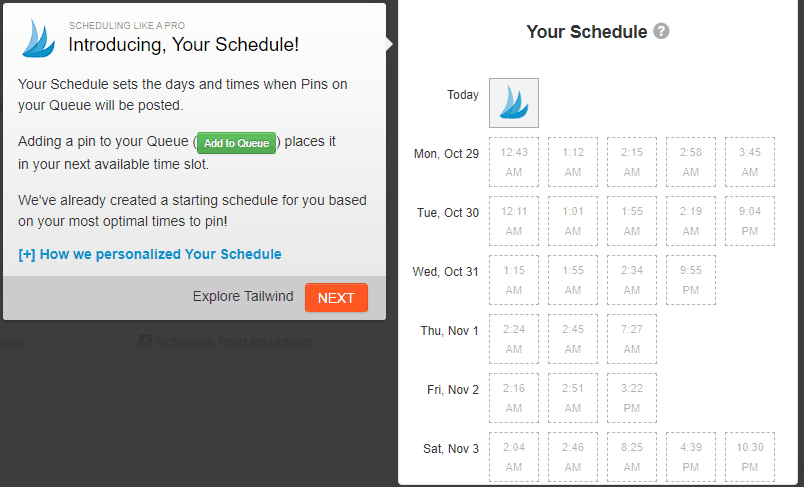
You can always add in more time slots in the future. Just go to ‘Your Schedule’ in the menu on the left and begin adding time slots manually by clicking on ‘Add time slot’.

Right below ‘Your Schedule’ in the above screenshot, you will notice that there is a tab titled ‘Board Lists’.
This is a feature you will find very useful if you like adding pins to multiple boards at the same time.
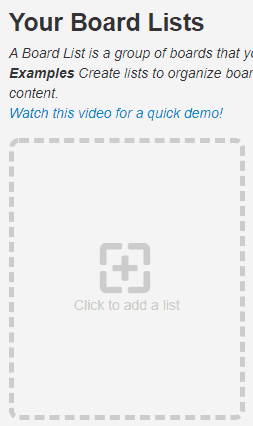
What you do here is create lists of boards that cover similar topics so that next time you pin an image you won’t need to select each one of those boards individually. You can just schedule pins to all boards in one list together.
And to ensure that the pins don’t go out around the same time you can take advantage of their interval pinning feature. You will notice that after you add a list of boards a button titled ‘Use Interval’ will appear below the pin.
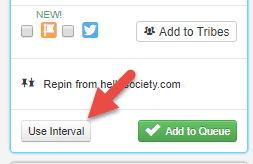
If you click on this a dropdown menu will appear.
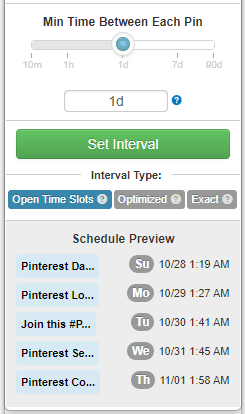
And you will be able to set things like when you want the first pin to the boards to go live and the time interval between each pin. This will ensure that the same pins to different boards drive maximum traffic together and individually.
Another Tailwind feature that can help you get a lot of traffic is ‘Tribes’.
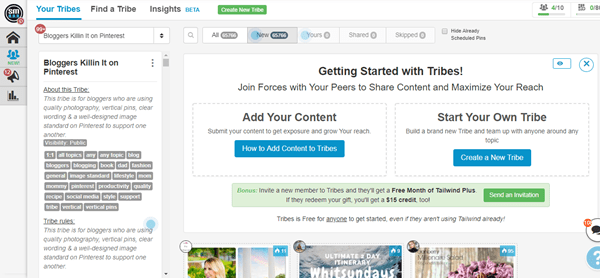
Tribes are communities of pinners present within Tailwind. The members of tribes will add content to their tribes so that other members can share it with their followers and they themselves repay the favour by sharing.
To add your pins to a tribe you simply need to click on ‘Add to Tribes’ and select the appropriate tribes.
But make sure that instead of just adding your own pins, you actively take part by sharing other tribe members pins. Actively taking part in tribes can actually save you a lot of time as you can quickly find pins to schedule in one place. Reaching that threshold of 25 pins a day will become much easier now.
Tribes comes with analytics. It helps you check which Tribes are working and which Tribemates are sharing your content.
Two other Tailwind features that make it easy to schedule more pins quickly and easily are SmartLoop and ‘Suggested pins for you’.
SmartLoop is similar to the reschedule feature offered by other social media management tools where your most popular pins are automatically scheduled for the future. The only difference is that Tailwind’s is much more advanced.
Using it you can create both seasonal SmartLoop pins and Evergreen pins and do so many other things.
Suggested pins for you shows you pins that are similar to the one you just pinned so that you can directly pin them without leaving your dashboard.
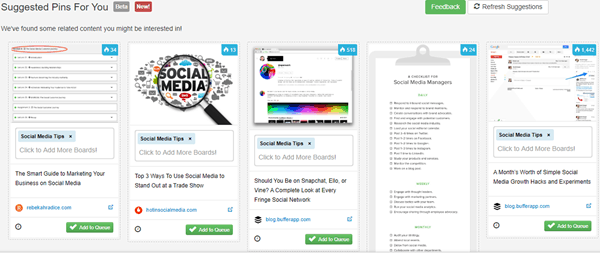
This feature is a great time saver as well.
Another time saving feature is Crosspost. This one lets you automatically share your pins on to Facebook and Twitter.
And of course Taiwlind comes equipped with Pinterest analytics.
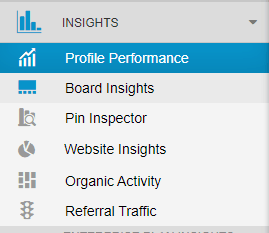
It has various features like Pin Inspector, Board Insights and Website Insights that make it easy to view your profile and website’s Pinterest performance.
Also, Tailwind are an official Pinterest Partner tool. You can be sure that they will keep your accounts and personal information safe.
So, go on and make the most of this tool and sign up now. Your first 100 pins are free.
And if you’re happy with it you can upgrade to a Plus account which costs $119.88 for the whole year or $14.99 per month.
Tailwind found that those who upgrade get 6.9 times more saves and 3.7 times more followers than their average users.
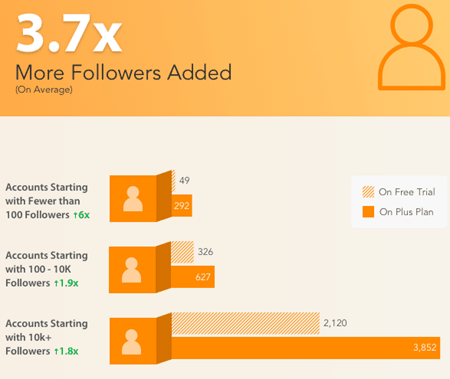
Therefore, you should definitely give Tailwind for Pinterest a try.
Using Tailwind to Schedule to Instagram
Just like with Pinterest, Tailwind has various features that can save you a lot of time while scheduling Instagram posts.
To add your account hover over the ‘+’ sign in the top right corner and click on ‘Add New Account’.
Then login to your Instagram account and click on ‘Add New Instagram Account’.
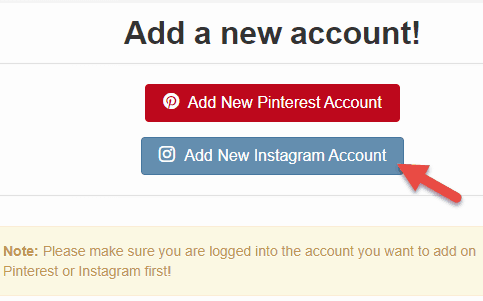
Next, authorize your account and connect your corresponding Facebook page.
After that you should verify your phone number and get Tailwind to personalise your schedule i.e. create an optimal post schedule for you.
Your Tailwind account will be set up and you can begin scheduling Instagram posts. With this free plan you can schedule 31 posts for free.
You can begin creating your posts by either using your browser extension (to share user generated content and for regramming and shoutouts) or by using their drag and drop visual uploader.
Once you upload your first image, Tailwind will automatically guide you through the process of scheduling Instagram posts.
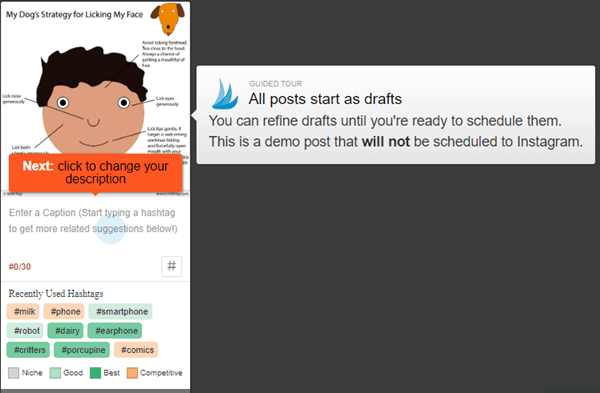
You will see how you can use hashtag finder, hashtag lists, add descriptions and then queue your posts.
Hashtag finder suggests hashtags you can add to your posts based on your past activity. You can add the ones you like most with a click. It can save you a lot of time.
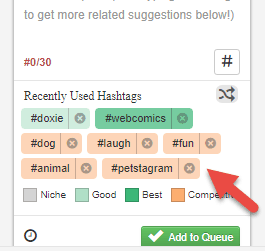
While hashtag lists lets you create lists of hashtags. You can add all of them with a couple of clicks.
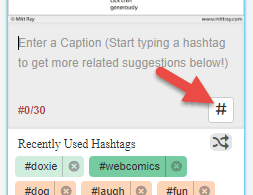
All you need to do is click on the hashtag icon highlighted in the above screenshot and choose the list you want to add. You can always create more hashtag lists by clicking the ‘+’ icon and adding hashtags and giving the list a name.
These two features can make the process of adding hashtags you frequently use easy, but they won’t help you find new ones. To find new ones you can use a tool like Brand24. I have shown you how to use it to find top and trending Instagram hashtags in this post.
Posts with 11 or more hashtags get the most engagement. So, these features will help you get more likes, comments and followers with a smaller effort.
After you add your hashtags you can directly schedule from your desktop itself if you have a businesss account as Tailwind lets you autopost. You don’t need to transfer your post to a mobile device first.
And after your posts go live you can view their analytics features ‘Profile Performance’ and ‘Post Inspector’ to see what posts are working best for you, what hashtags get the most engagement and more.

All these Tailwind features can save you a lot of time while using it to schedule to Instagram.
And they are an official Instagram Partner tool, so you can be sure that they will you’re your accounts and personal information safe.
Therefore, sign up now and make the most out them and schedule your first 31 posts for free. If you are happy you can upgrade to a Plus plan for $119.88 or for the whole year or $14.99 per month.
Tailwind found that compared to the average Tailwind users, plus plan users get 1.8 times more likes and 1.3 times more followers.
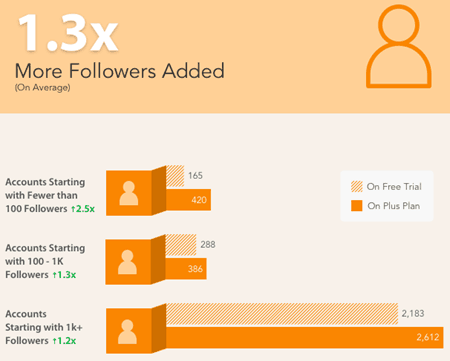
If you are serious about getting more engagement and followers from Instagram you should definitely upgrade.
Go on, build a powerful presence on Pinterest and Instagram with Tailwind…
As you can see above, Tailwind has many advanced features that can save you a lot of time while scheduling to both Pinterest and Instagram. Most other social media management tools do not offer any of these features. This makes them unique.
So, if you want to build a strong presence on Pinterest and Instagram you must sign up for a free account now and test them out. If you happy with it, you can always upgrade later.
Do you use Tailwind to schedule to Pinterest and Instagram? How has it helped you? Please leave your comments below.
If you found the above post on how to use Tailwind to schedule to Pinterest and Instagram useful and feel your followers will too, please share it with them by using the share buttons below.

